Capture a Certain Part of Your Screen!
Sure capturing your entire screen is nice when you need to see everything at once, but what about those times where you just want to grab certain parts of your screen.
Windows 7 has a great tool built-in that let’s you do just that. It’s called the Snipping Tool.
1. Click on the Start menu, in the search bar above type “Snipping Tool”, then press Enter.
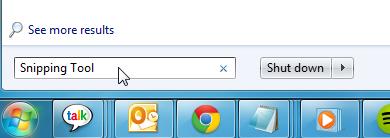
Right when you press enter, you will see that your entire screen “whites out” and the Snipping Tool dialog box appears
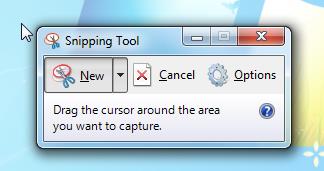
2. Click on the arrow besides “New” and you will see a menu where you can choose from many different kinds of screen capture techniques.
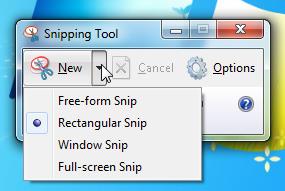
- A free-form snip is where you manually draw what part of the screen you want to capture.
- A rectangular snip is where you select a (you guessed it) rectangular area that you wish to capture. Note: this area can be any size you desire, it’s just as simple as dragging out the area you want to capture.
- A window snip is where you capture a full window.
- Of course the Full screen snip is your classic “Printscreen”.
3. For now we will use the rectangular area snip. Just draw out what you want to select, and you will see the area you want to capture is in full color and not “whited out” like the rest of the screen. It will also be surrounded by a red border.

4. After you have selected the area you want, press “Enter”.
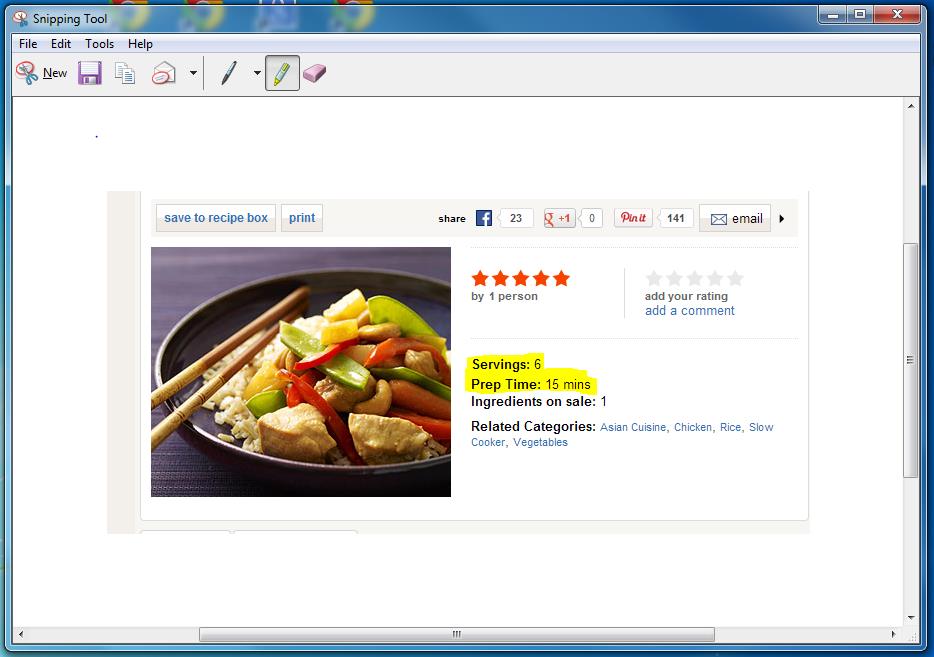
After pressing enter, you see a box will appear with a preview of your capture and several options to choose from.
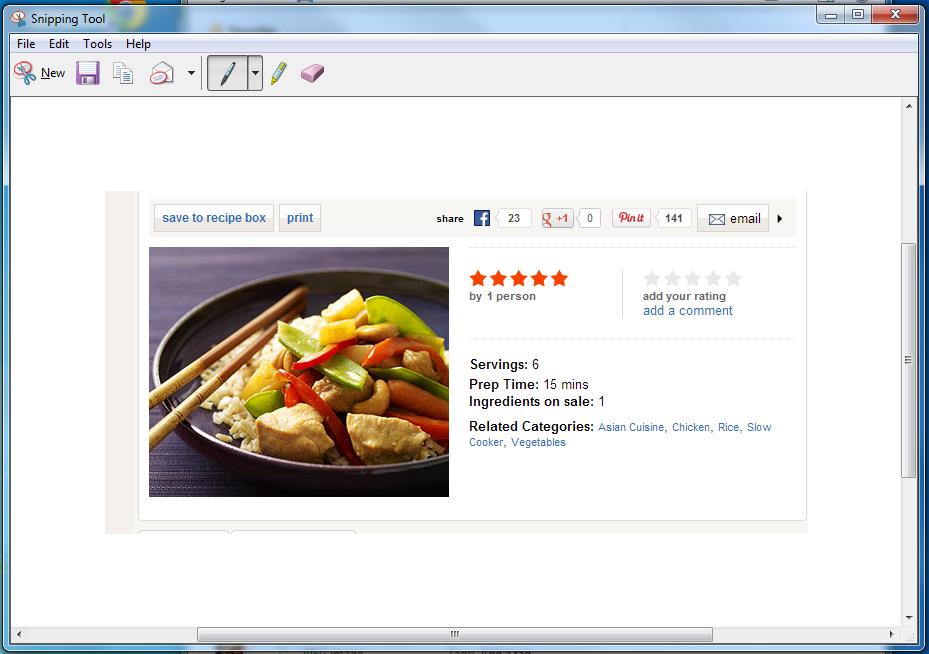
You can select Save, Copy to Clipboard, e-mail to someone, a pen and highlighter.
In this example, we will just highlight the servings and prep time.
5. Now click on the Floppy Disk  , and you will be prompted to save the file to a location of your choosing. Just choose your location, press Save, and you have successfully saved a particular selection of your screen!
